RoveSoSimulator Diversion Overview and Tutorial
Diversion Overview
Why Diversion?
As you may know, we are using Unreal Engine 5 for our simulator. This is a much-improved simulation solution compared to our past efforts. However, it is not without its drawbacks, a major one being version control. Initially, the simulator was in a standard Git repository, but this was not ideal for several reasons.
Firstly, Git was not designed to handle the very large binary files common in 3D projects like an Unreal Engine simulator. When a team member made even a small change to a 3D asset, Git would often treat it as a complete deletion and re-addition of that large file. This made repository sizes balloon and syncing incredibly slow. Furthermore, 3D asset files cannot be merged like text-based code, which led to constant problems with developers accidentally overwriting each other’s work.
These challenges prompted us to find an alternative. We ultimately chose Diversion, a version control system (VCS) designed specifically to work with Unreal Engine. While Diversion shares many concepts with Git, it is optimized for large files and the collaborative workflows of game development. It isn’t perfect, but it is the most effective solution we have found for this project.
Diversion Tutorial
This tutorial will walk you through the essential features of the Diversion desktop client that you will use for the RoveSoSimulator project.
The Diversion Hub
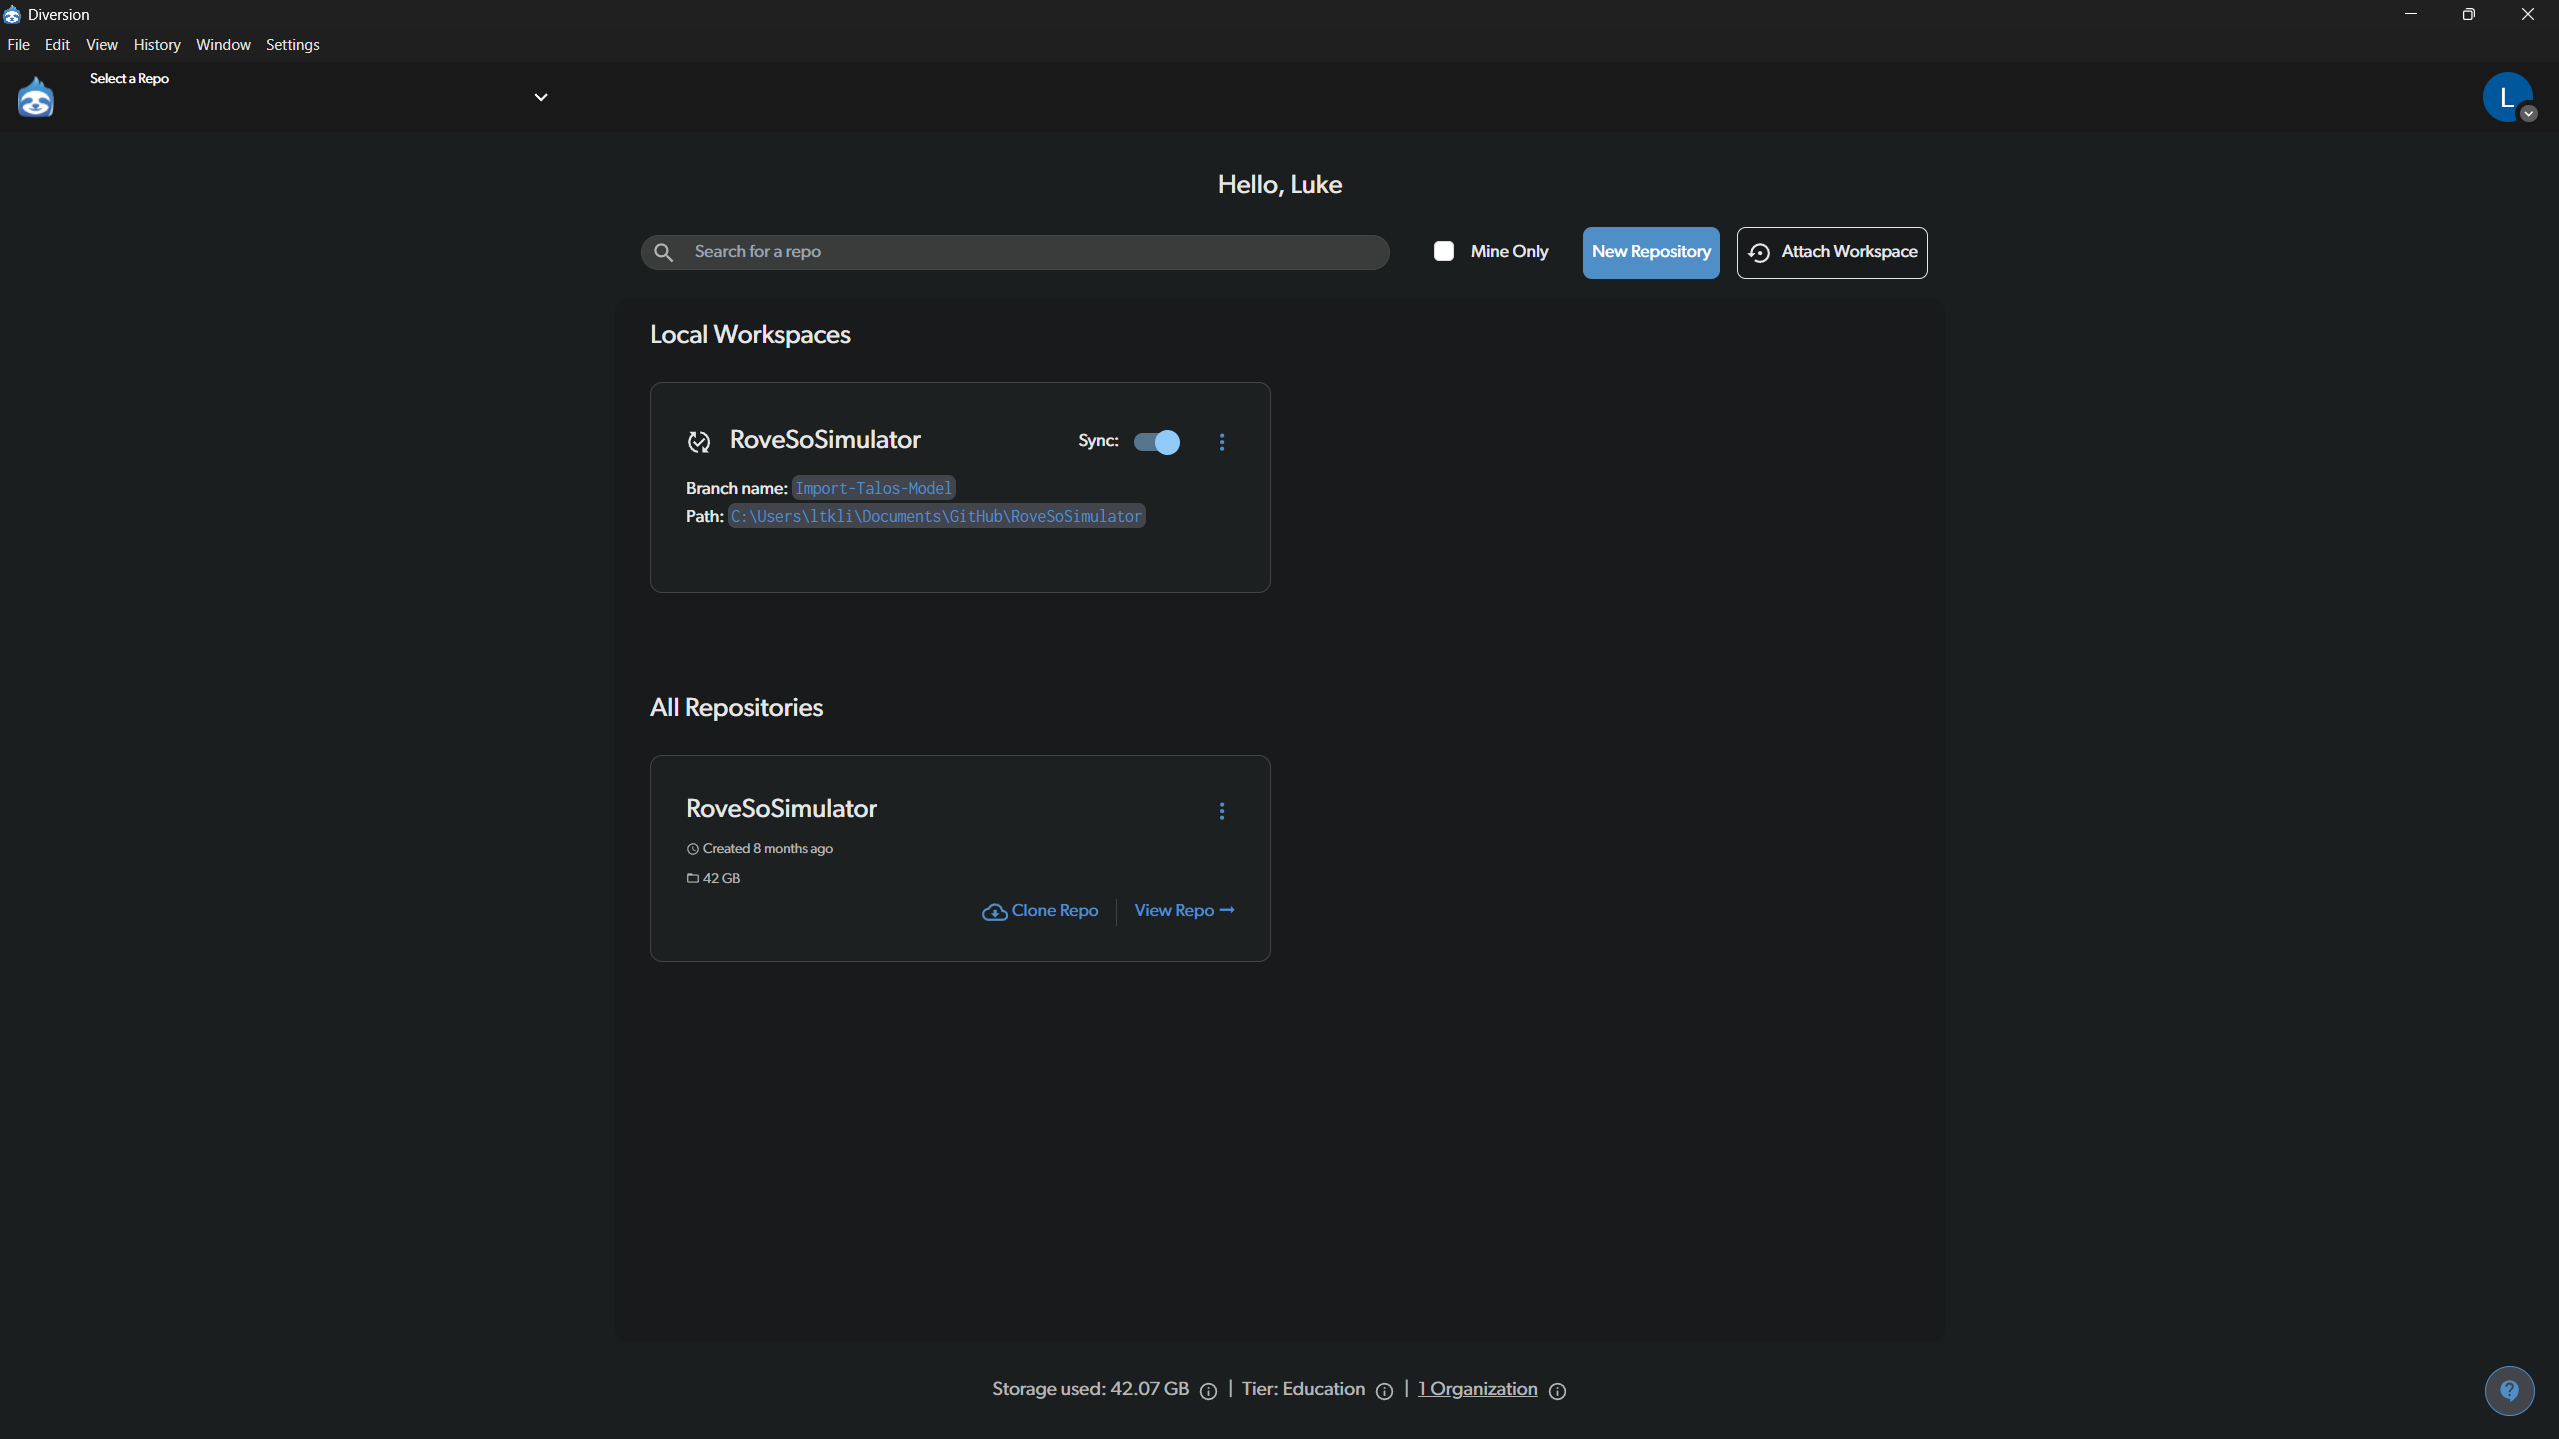
When you first open Diversion, you will see the main hub. This is your starting point for accessing all your projects.
- Local Workspaces: This section shows repositories that you already have on your computer. You can quickly open a project from here. The Sync toggle allows you to enable or disable automatic syncing of changes.
- All Repositories: This lists all repositories available to you from your organization. If you are setting up the simulator for the first time, you would find
RoveSoSimulatorhere and click Clone Repo to download it to your machine.
The Workspace View
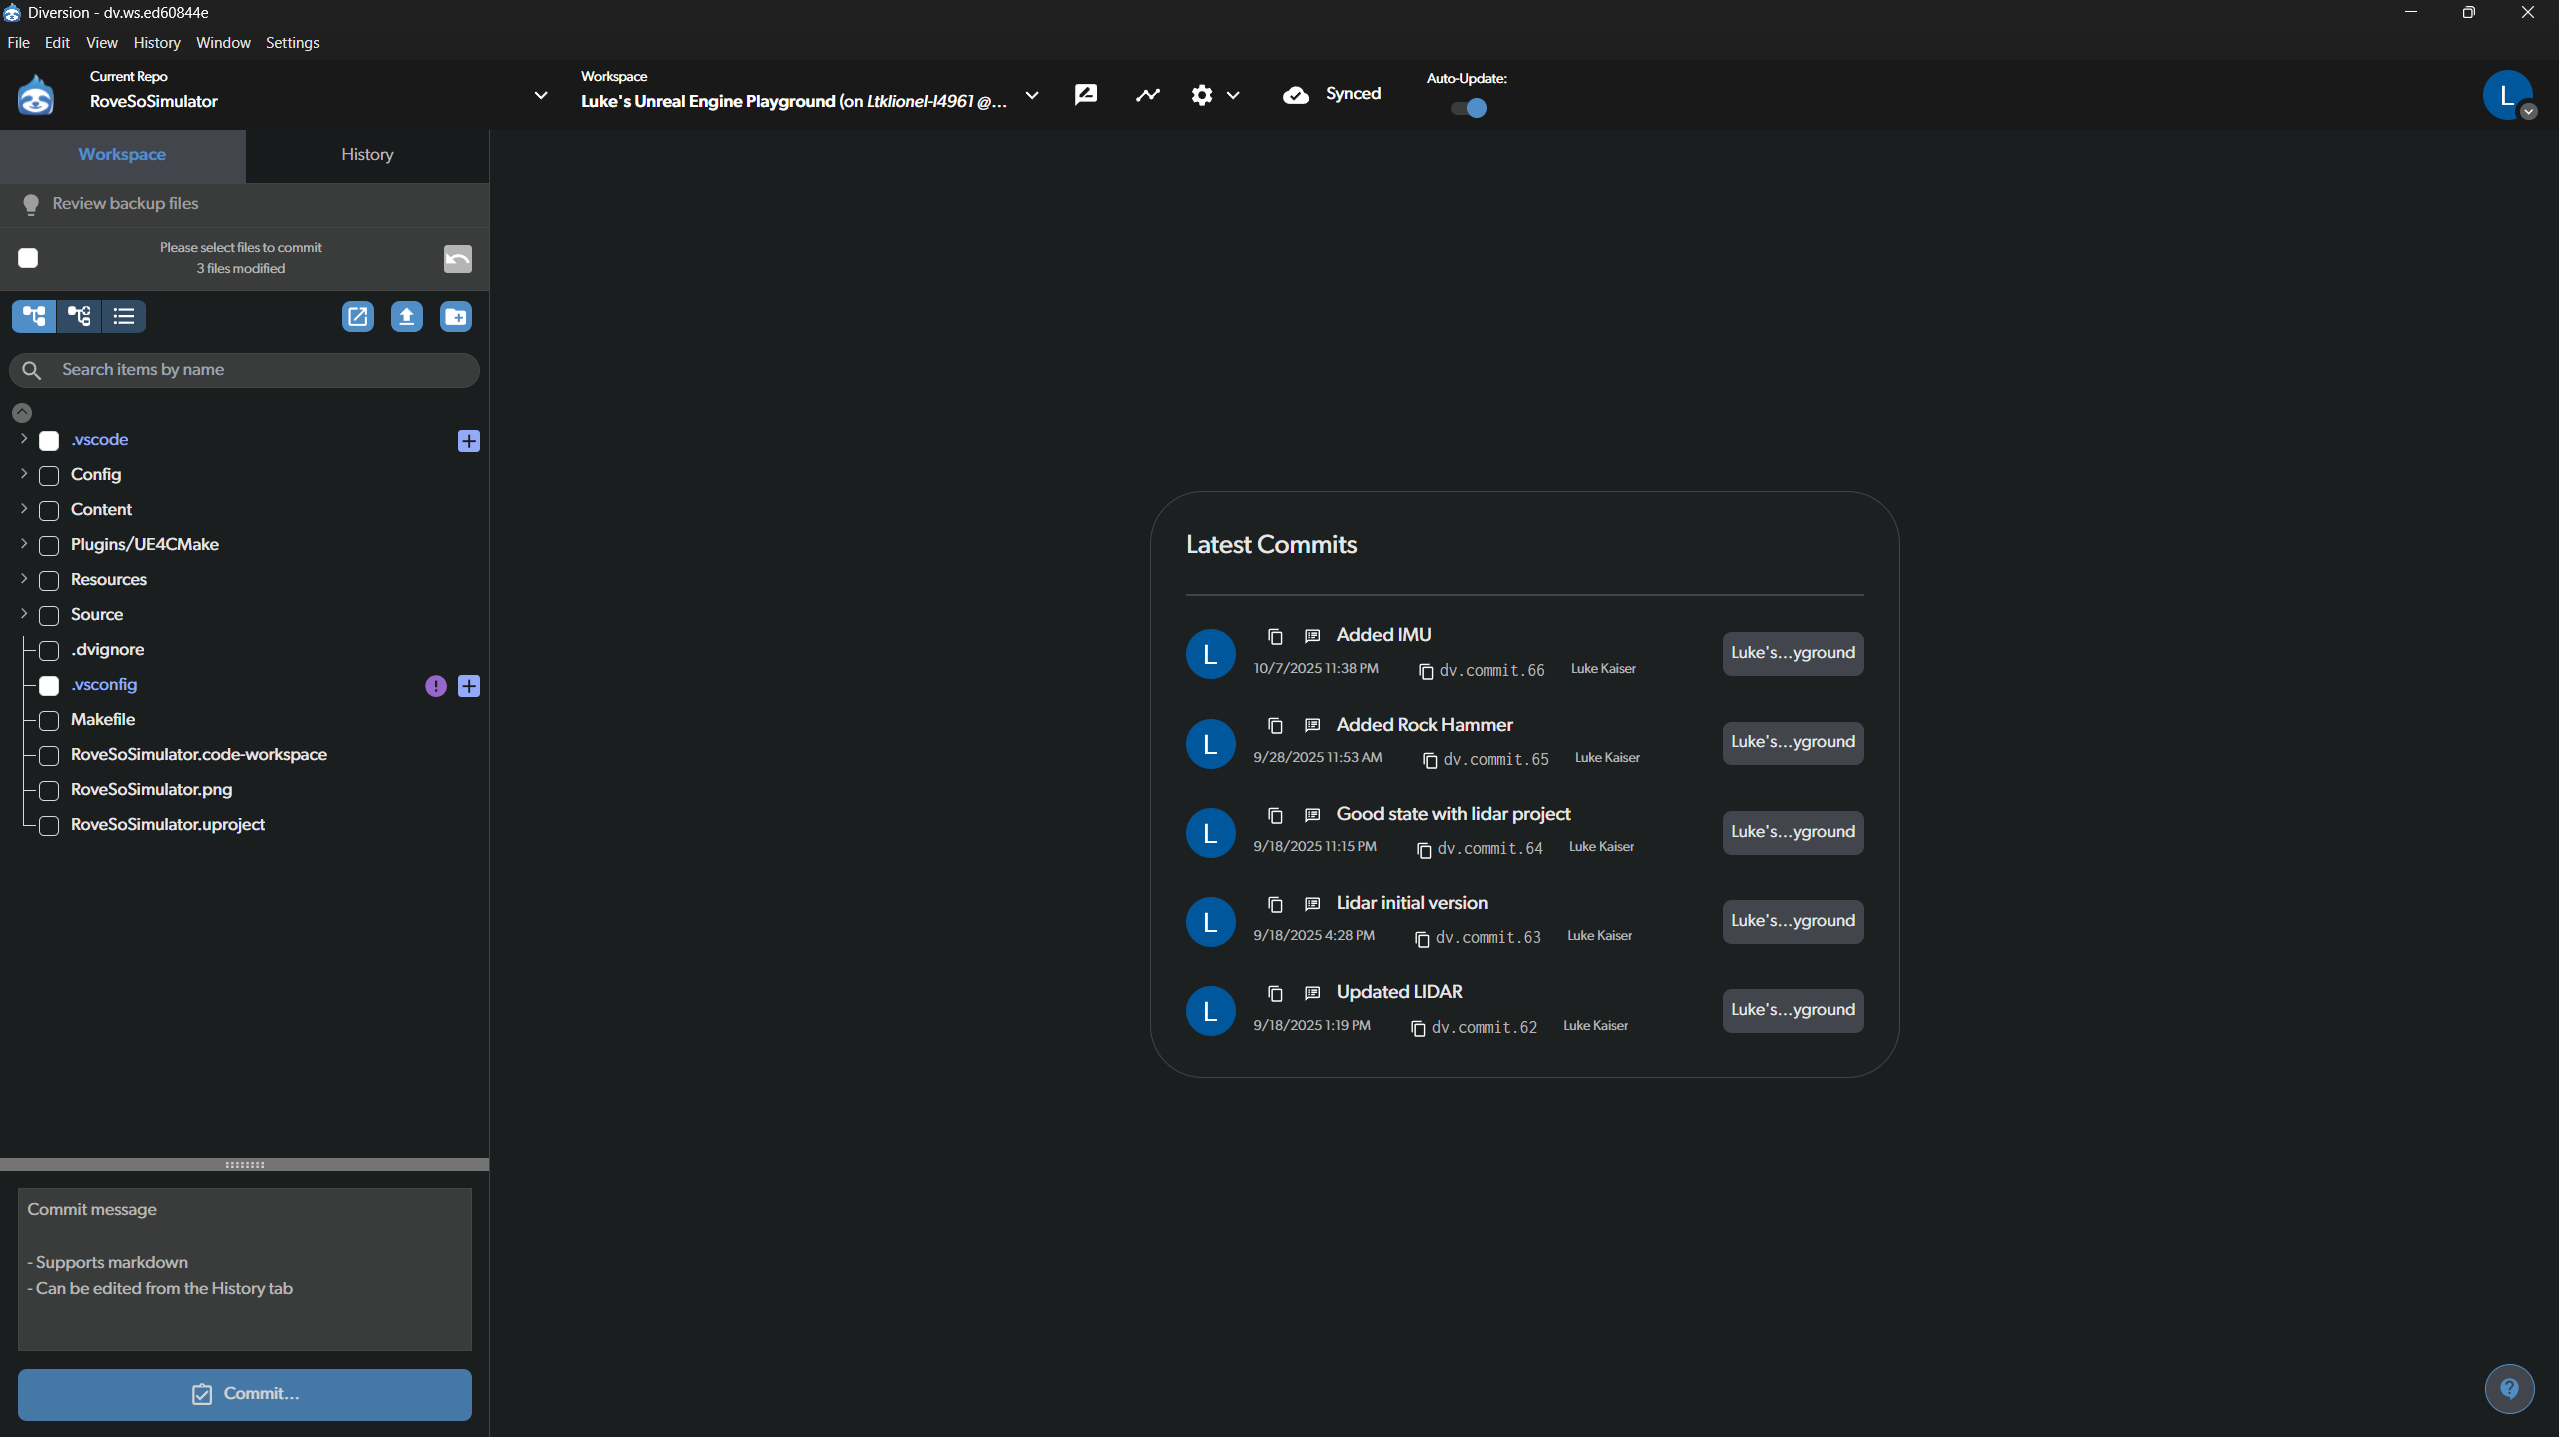
Once you open the RoveSoSimulator workspace, you will see the main interface. This is where you’ll spend most of your time.
- File Browser (Left): On the left is a list of all files and folders in the project. When you modify a file, it will appear here with a checkbox, indicating it’s ready to be committed.
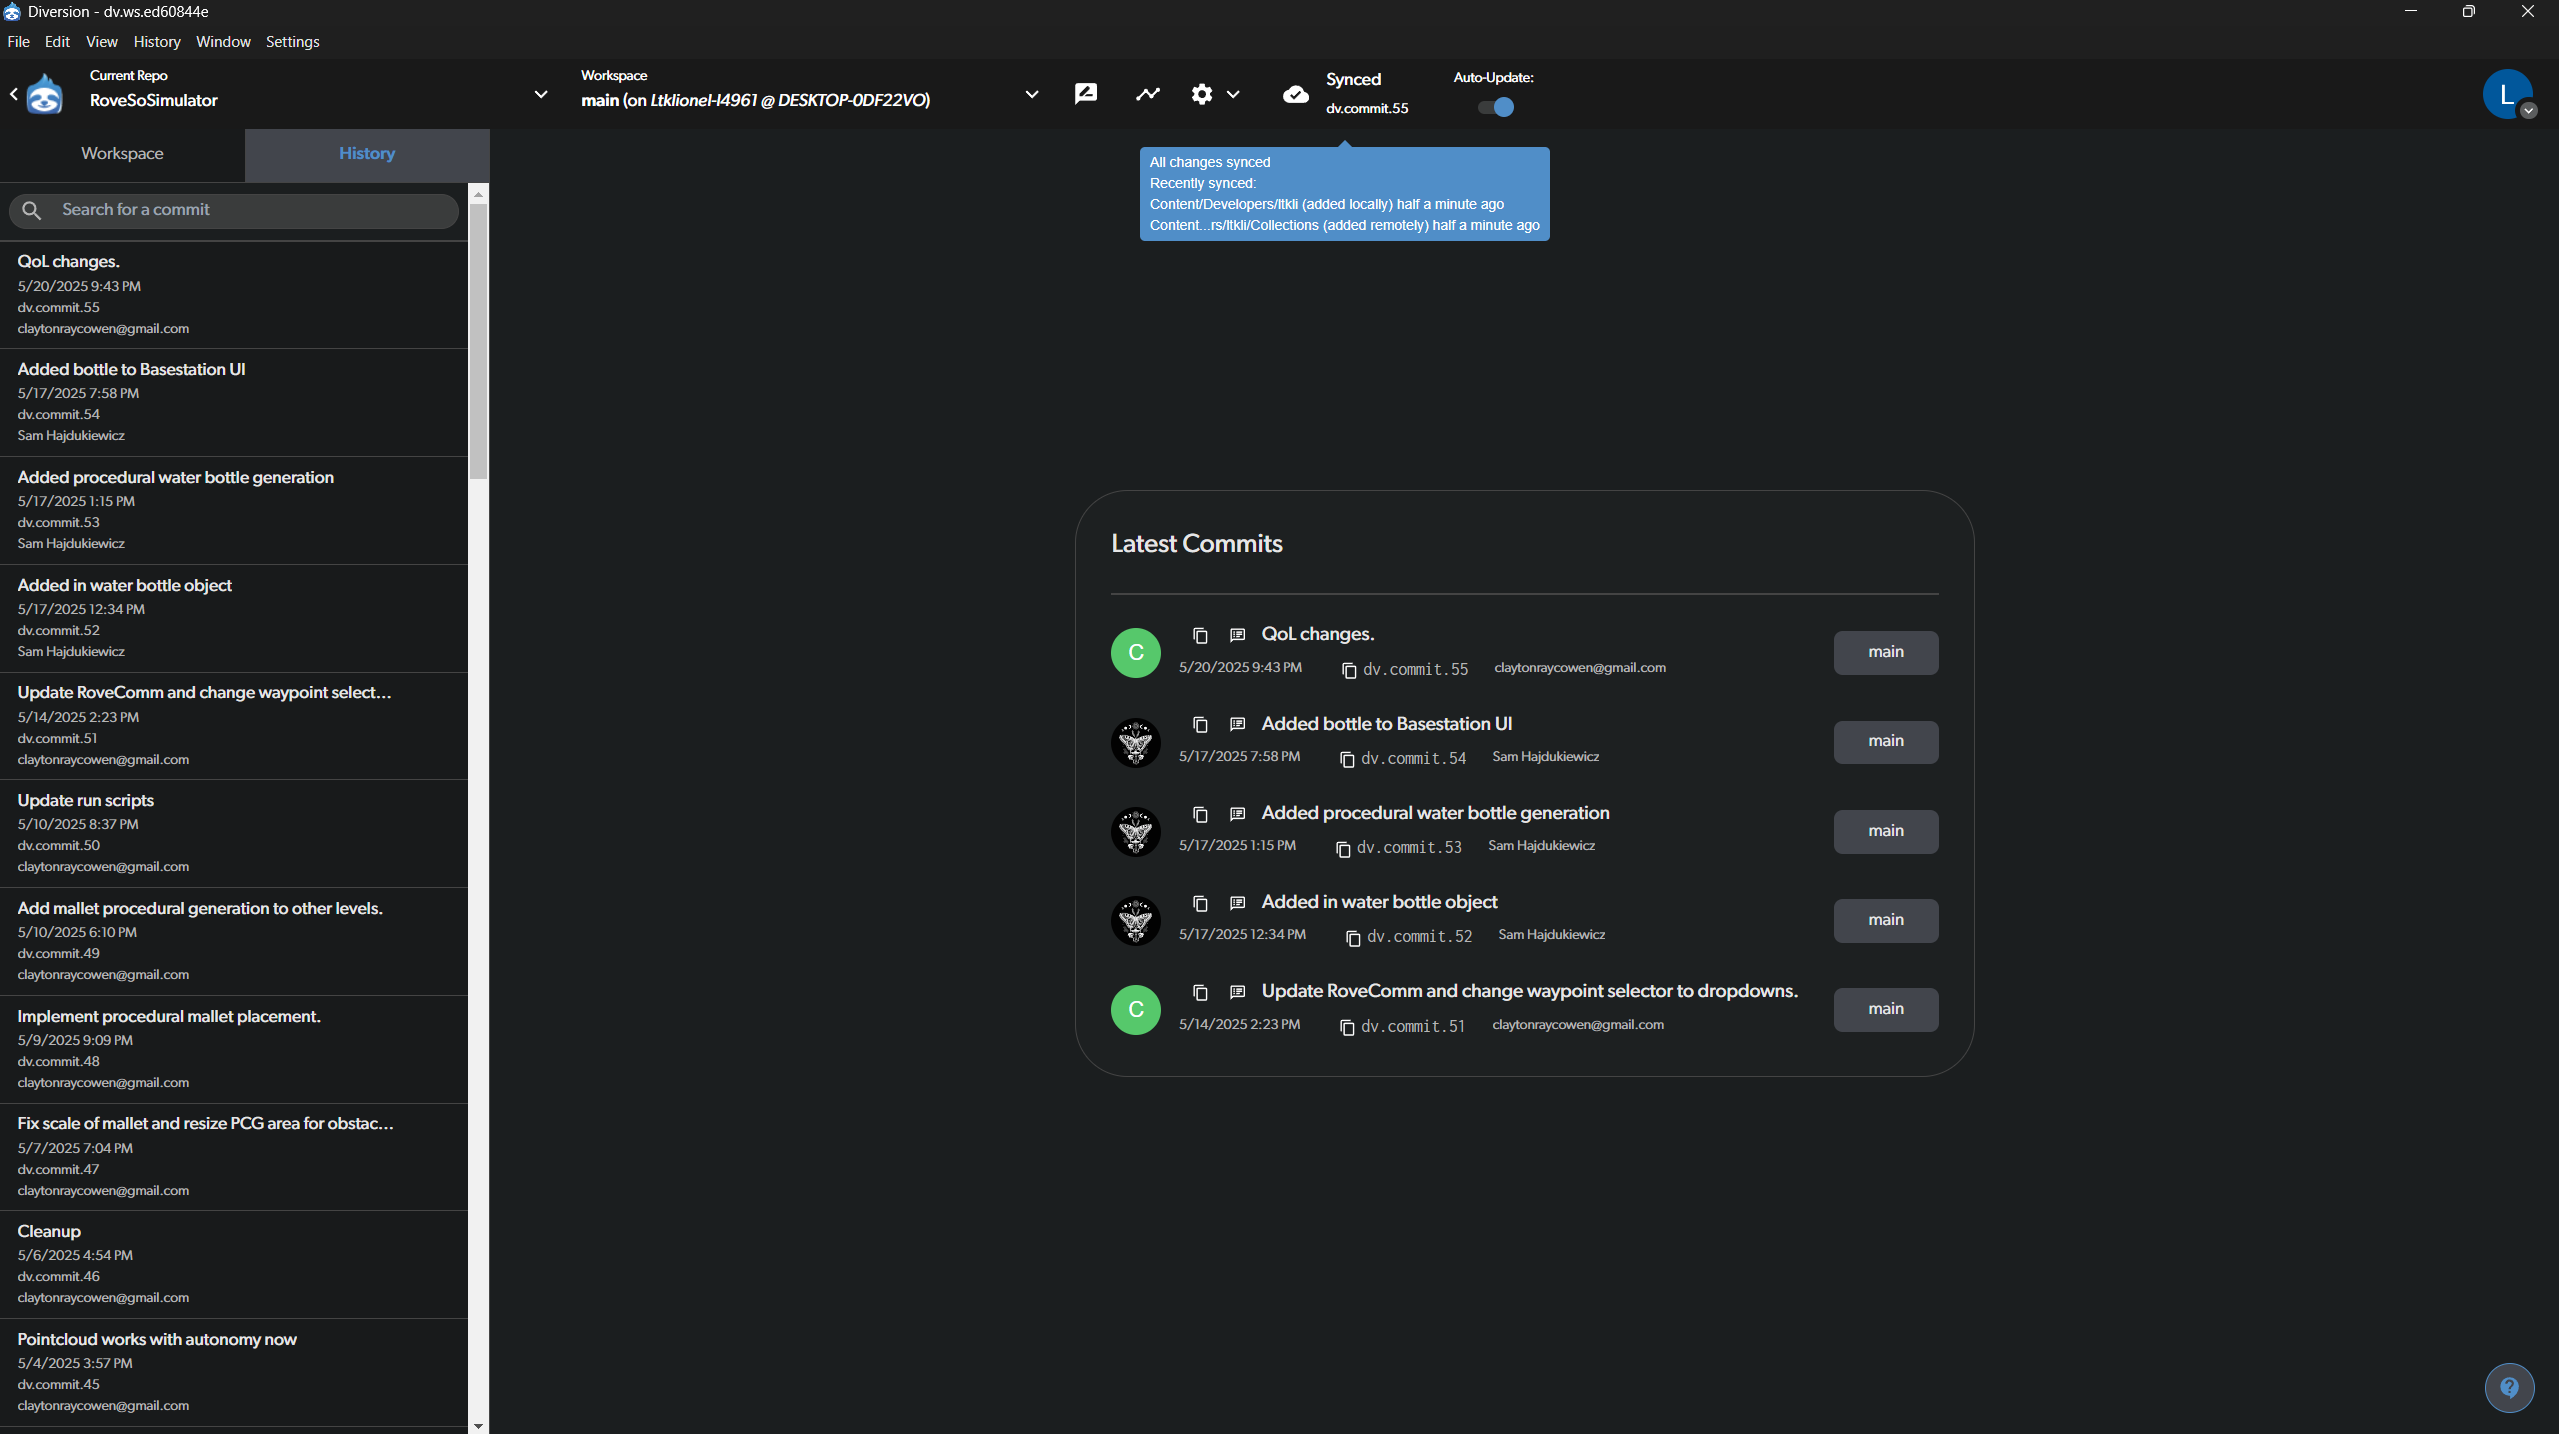
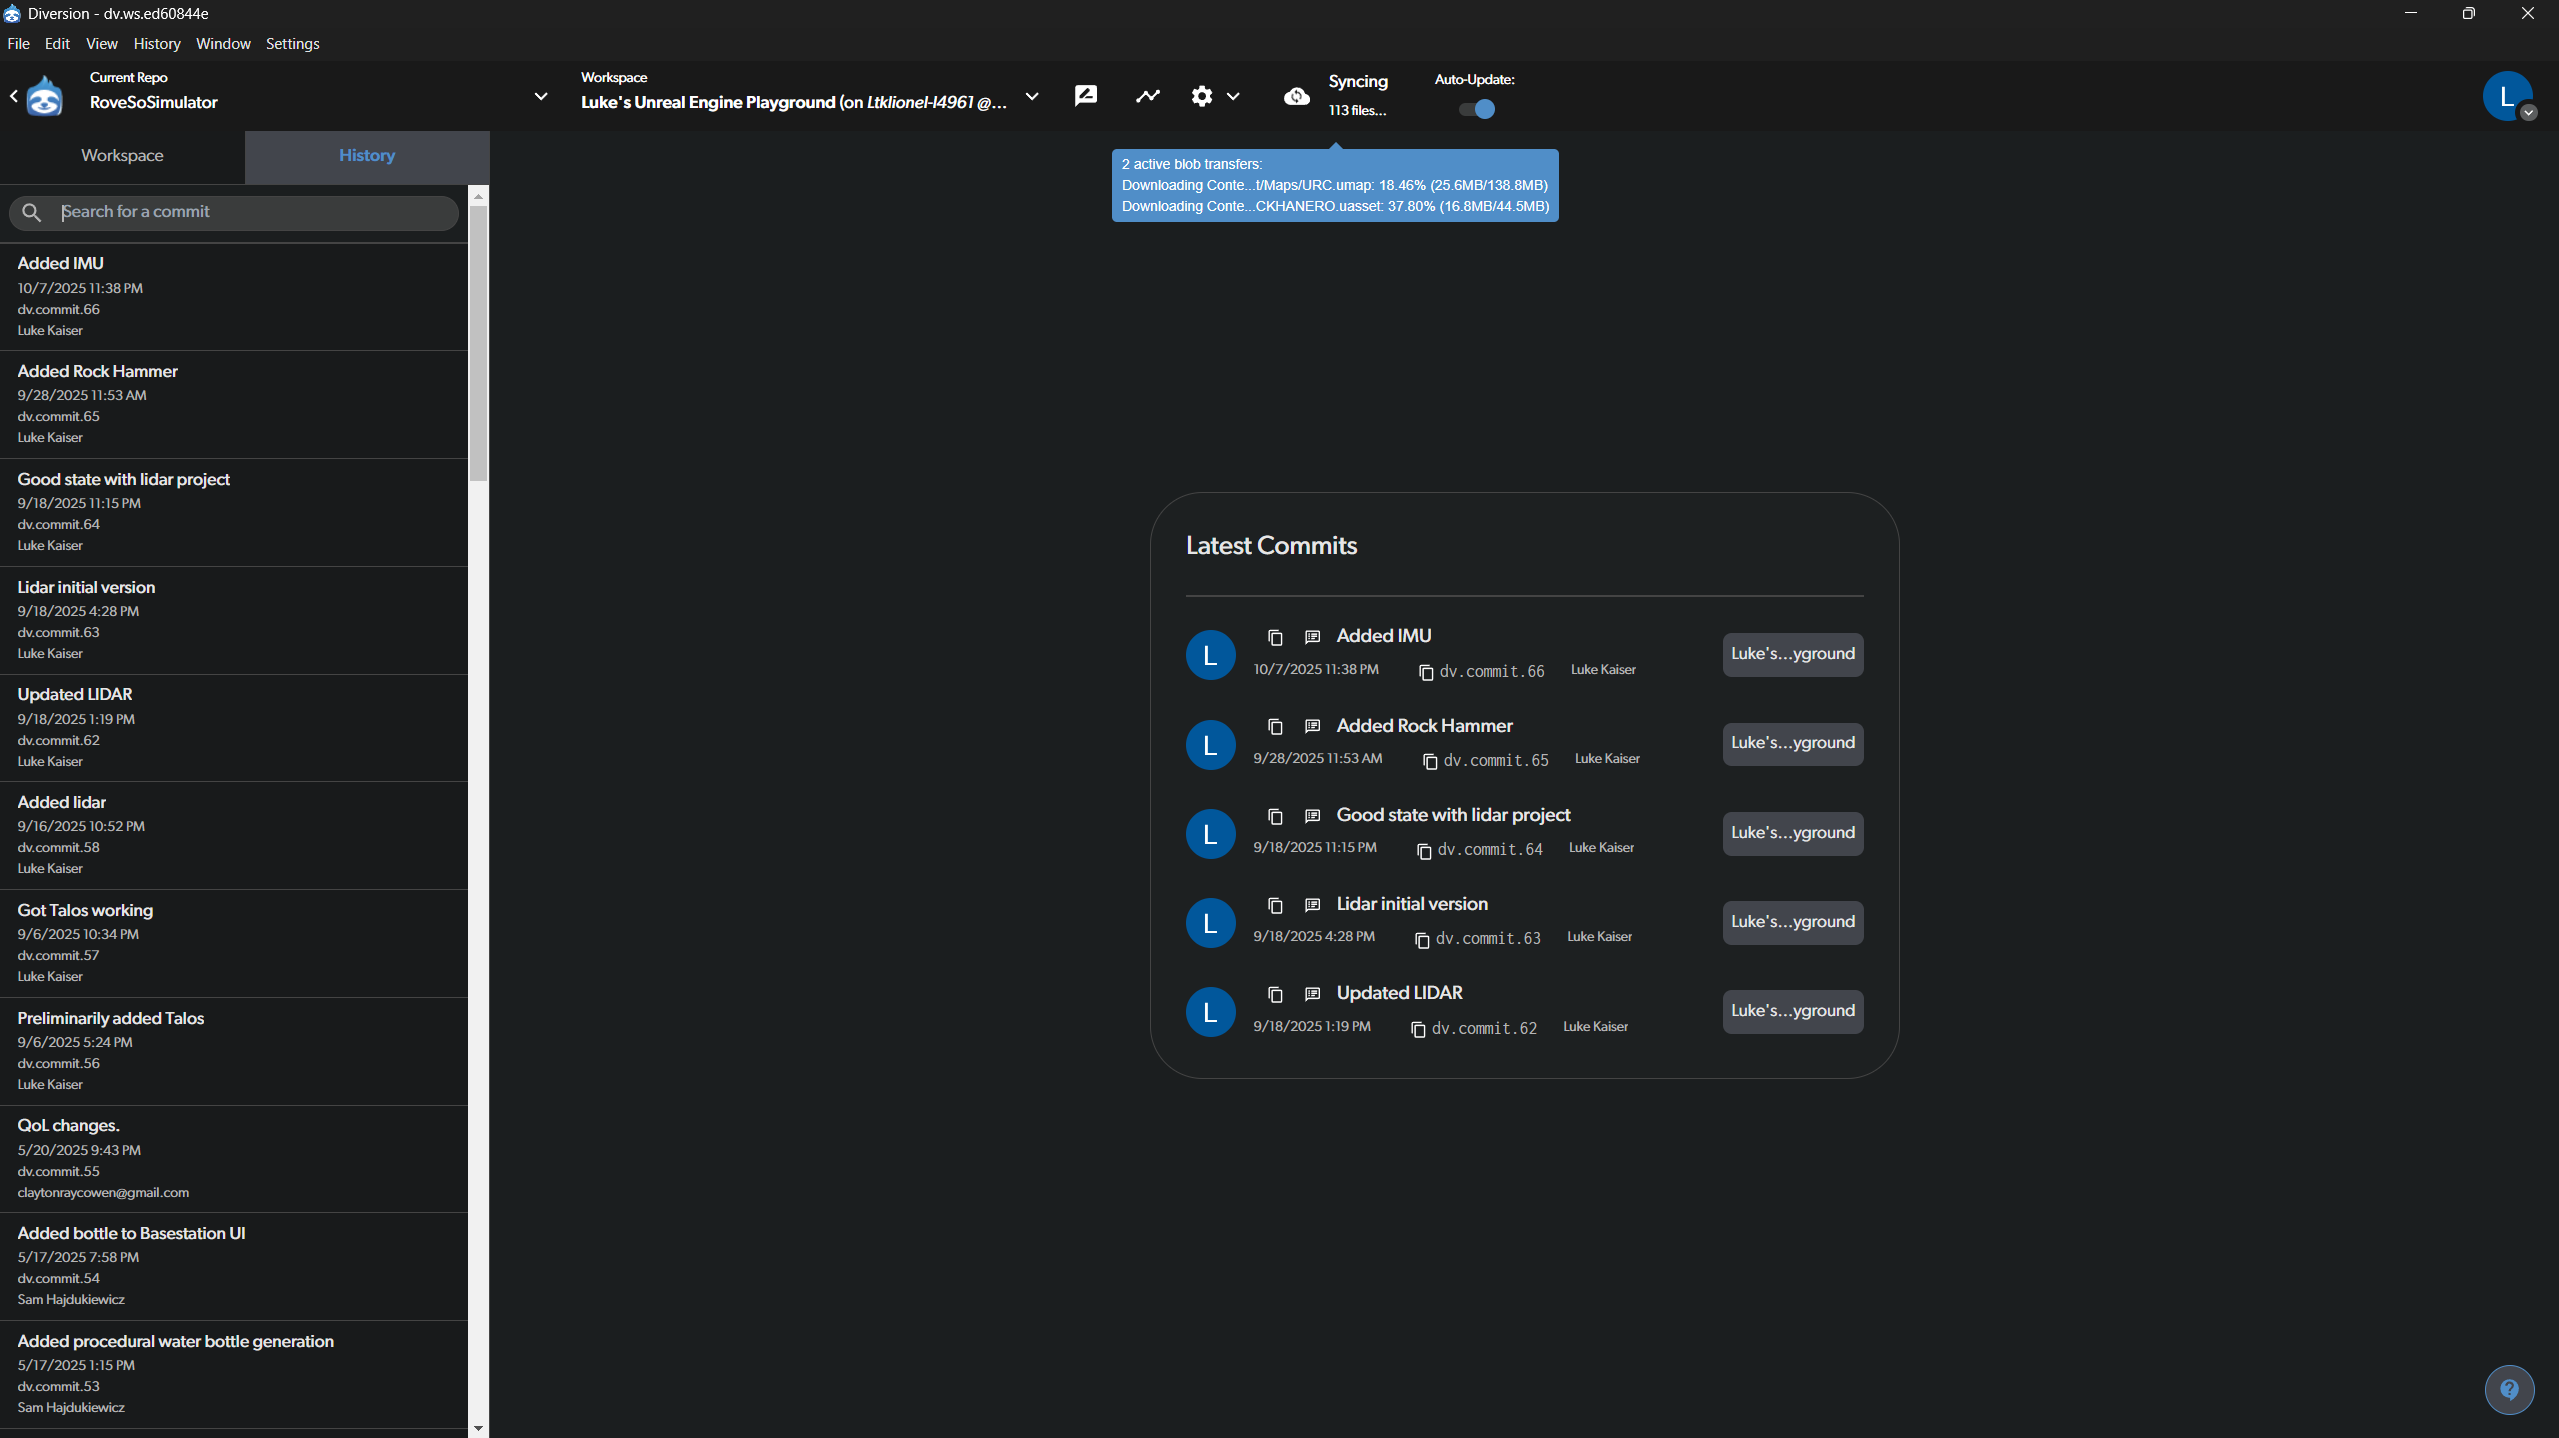
- Latest Commits (Center/Right): This panel shows a history of the most recent commits made to the repository, giving you a quick overview of recent project updates.
- Commit Message (Bottom Left): This is where you will describe the changes you’ve made before committing them.
Committing Changes
When you have made changes to the simulator, you need to “commit” them to save them to the version control history.
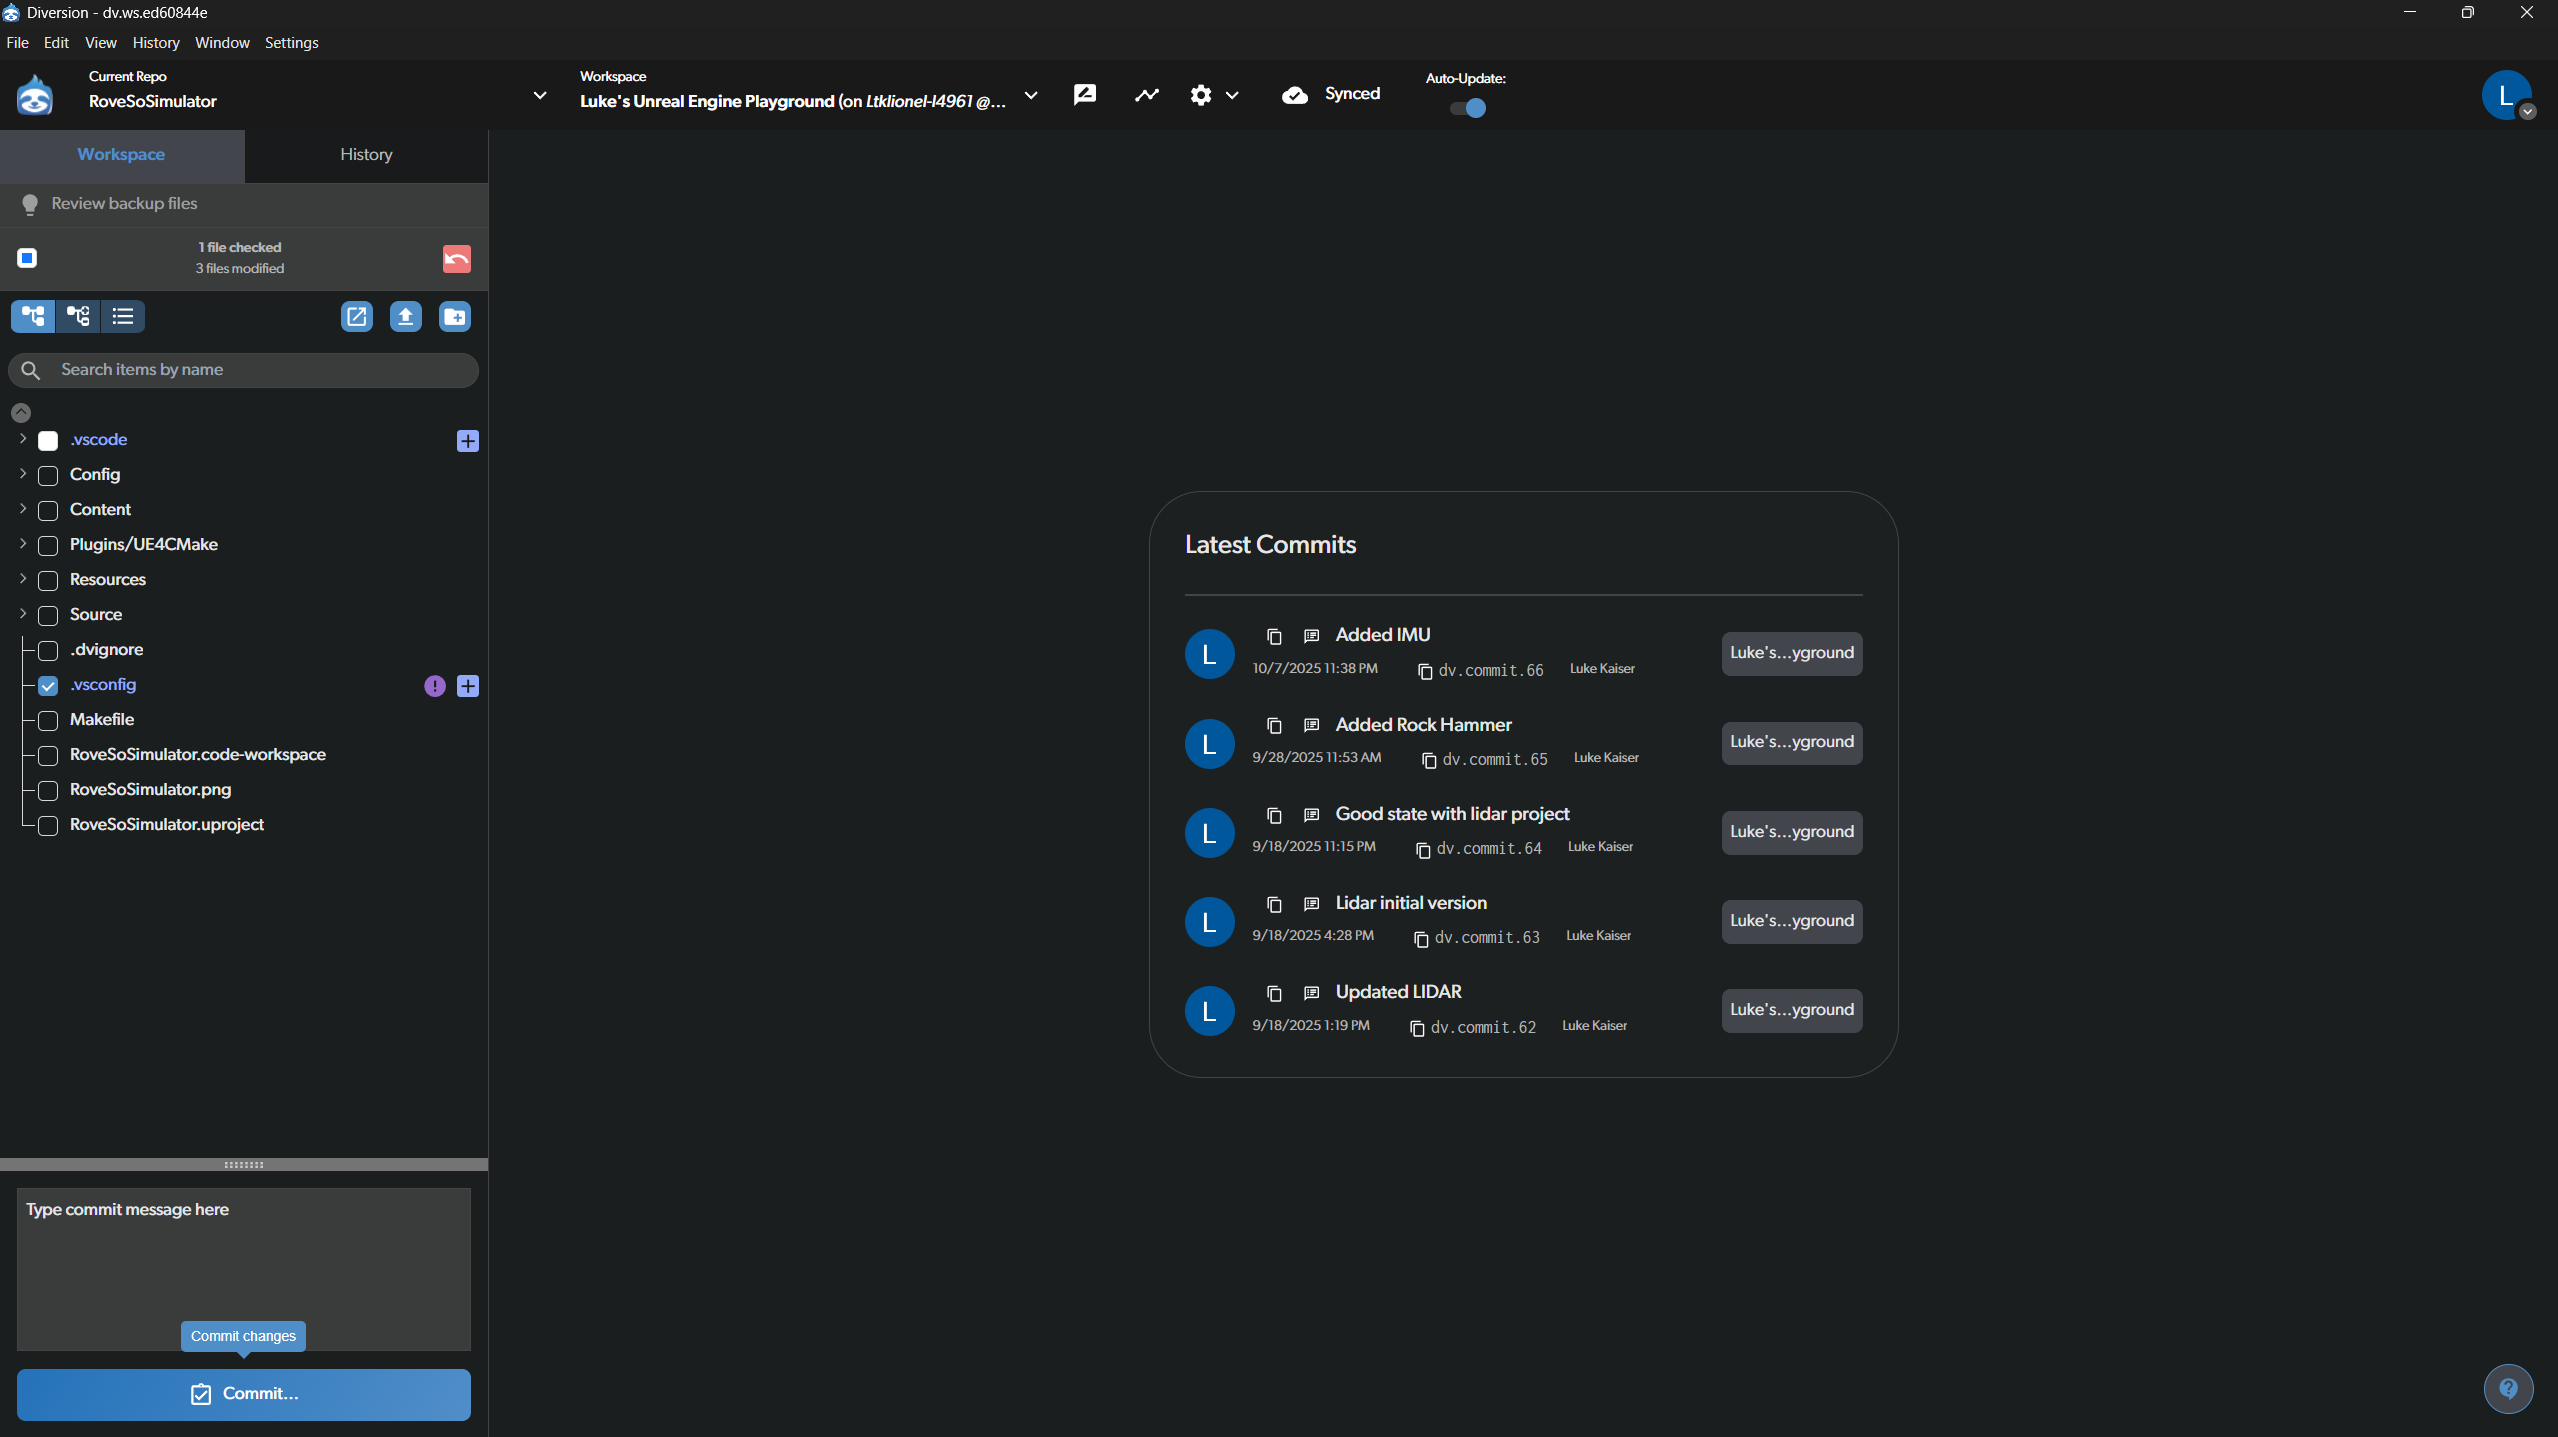
- Select Files: In the file browser on the left, check the box next to each file you want to include in your commit. The image shows the
.vscodefolder has been selected. - Write a Commit Message: In the “Type your commit message here” box at the bottom, write a clear and concise message describing what you changed (e.g., “Added a new LIDAR sensor model” or “Fixed the physics on the Rock Hammer”).
- Commit: Click the blue Commit button to finalize. This saves a snapshot of your selected changes to your local version of the repository.
Working with Branches
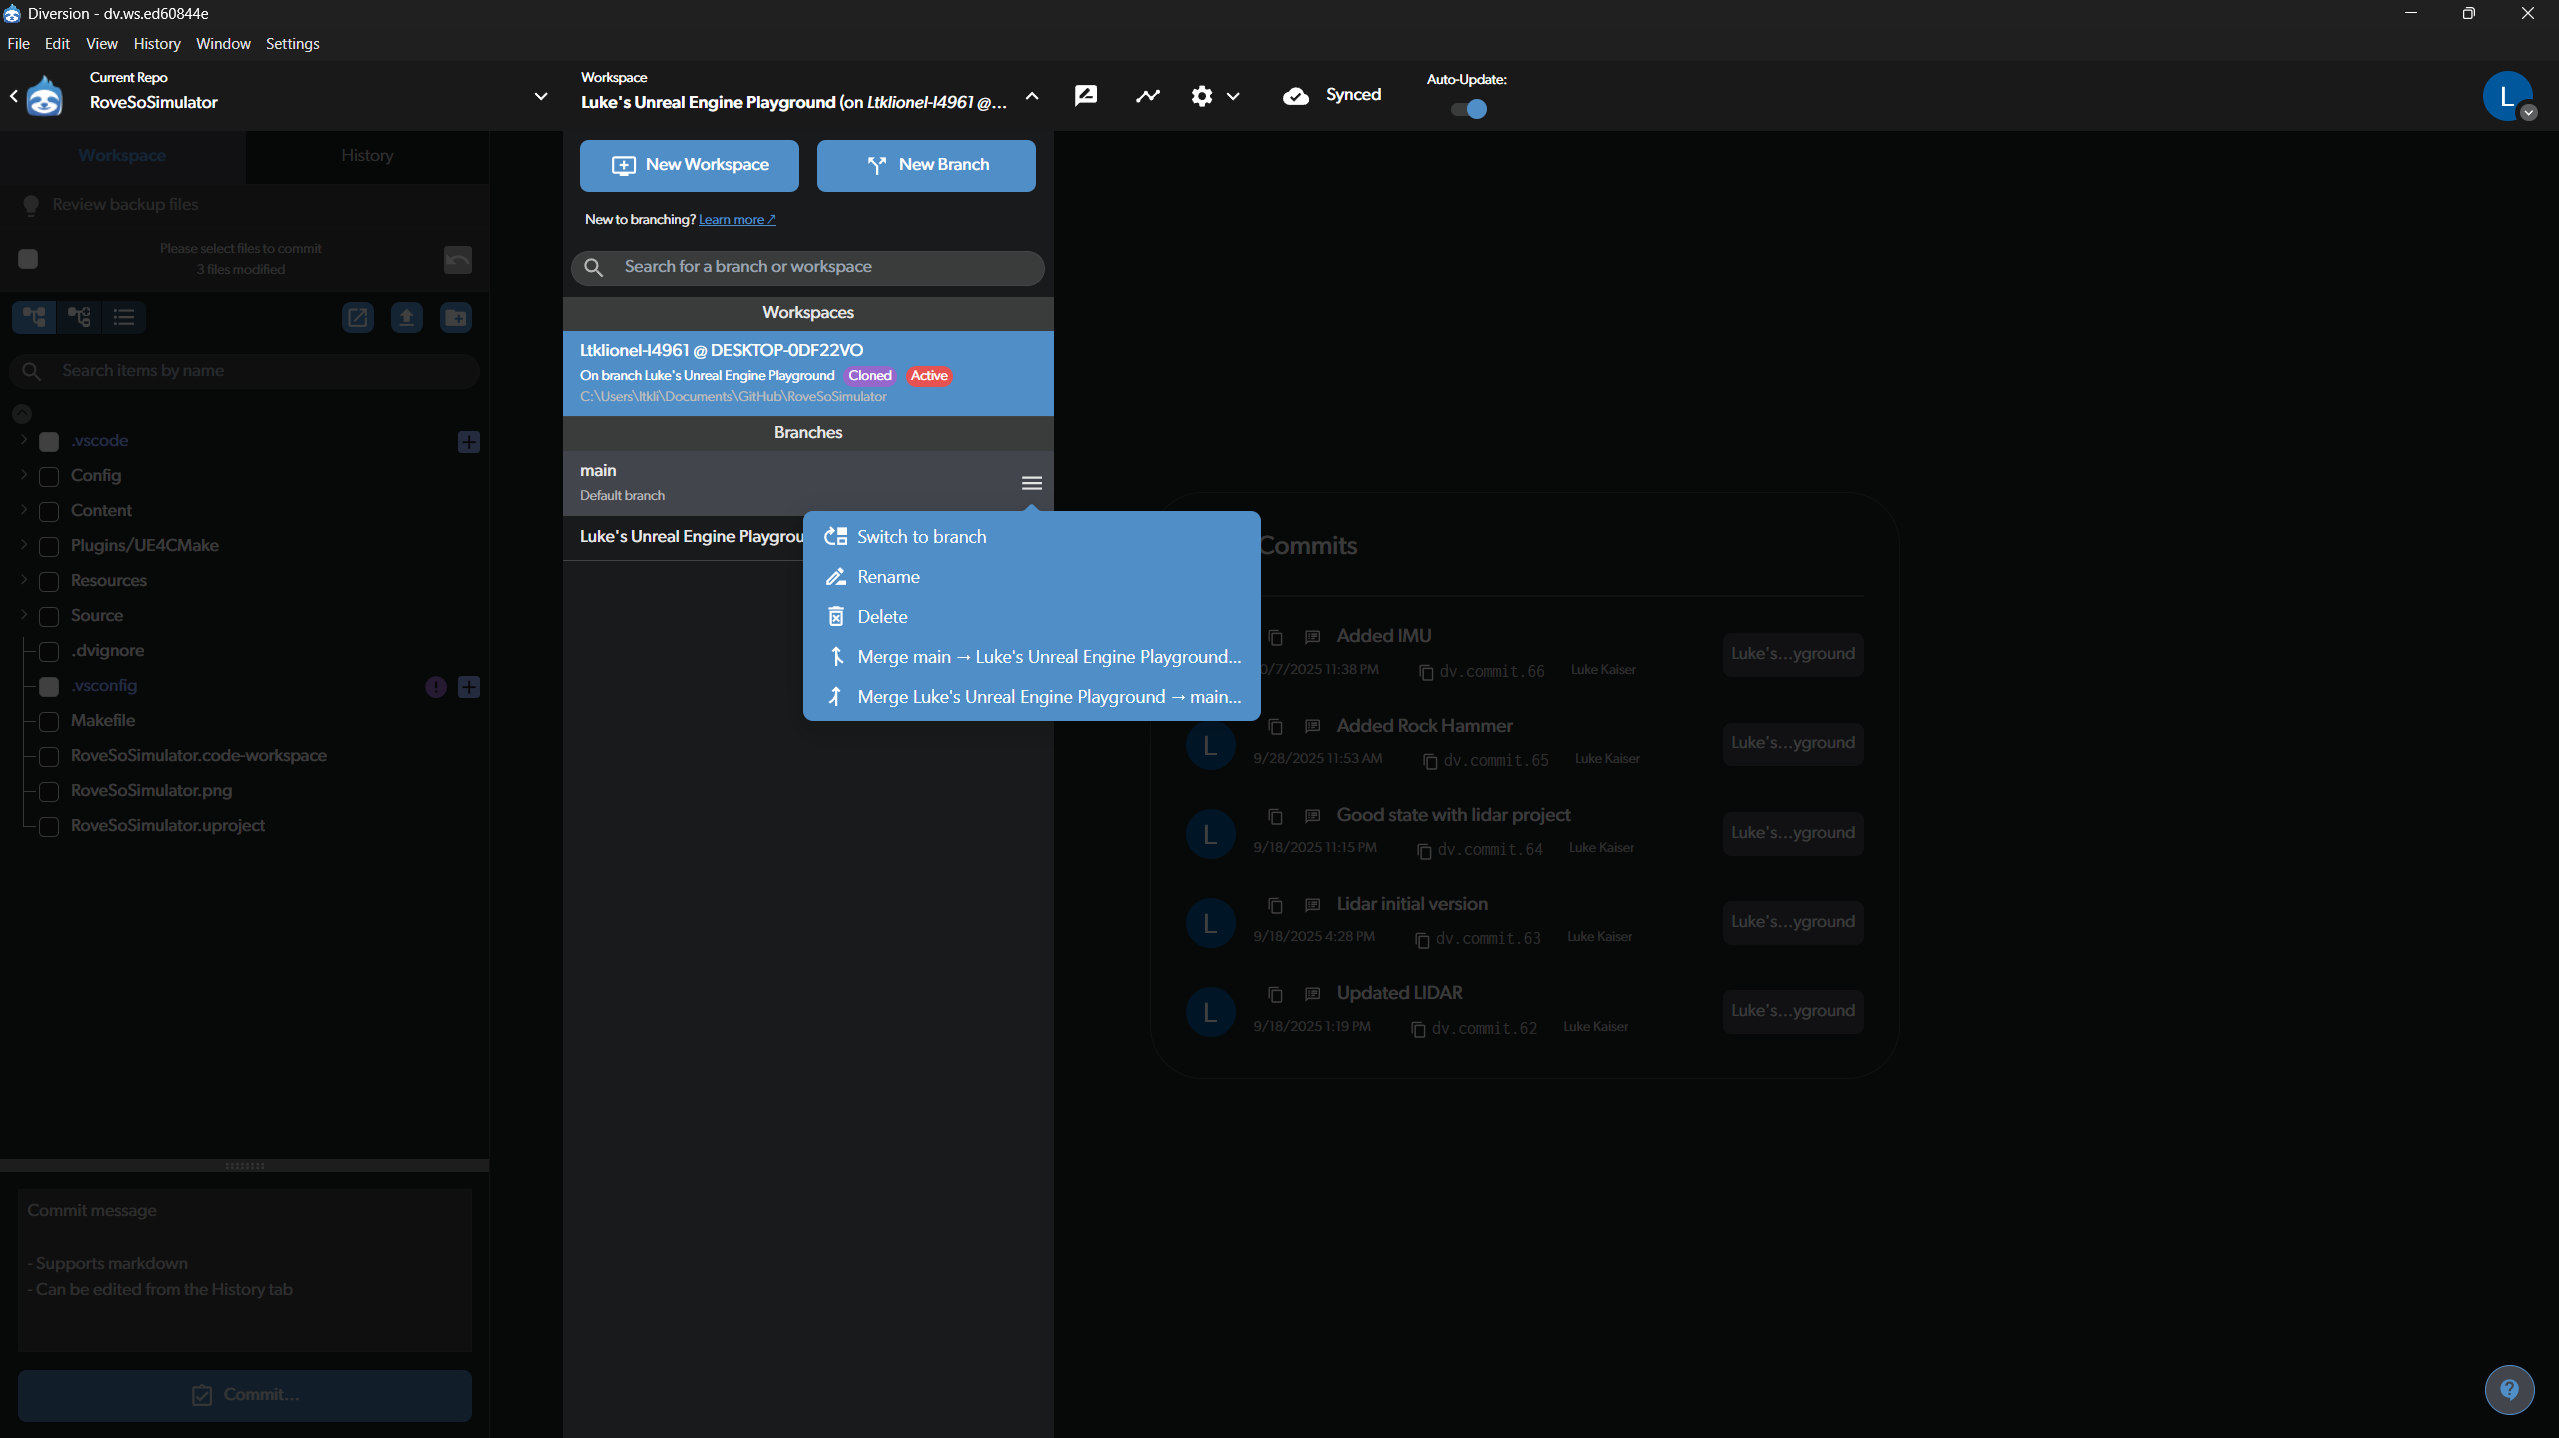
Branches are used to work on new features or fixes without affecting the main, stable version of the project (main branch).
- View and Switch Branches: At the top of the screen, click on the current workspace name (e.g., “Luke’s Unreal Engine Playground”). This will open the branch management view.
- Switching: You can see a list of all available branches. To switch to a different one, hover over it and click Switch to branch.
Handling Pending Changes When Switching Branches
If you try to switch to another branch while you have uncommitted changes, Diversion will ask you what to do with them.
- Take changes: This brings your uncommitted changes with you to the new branch.
- Save changes for later use: This “shelves” your changes, saving them temporarily so you can re-apply them later. This is useful if the changes are not ready to be committed.
- Discard changes: This will permanently delete all uncommitted changes. Use this with caution!
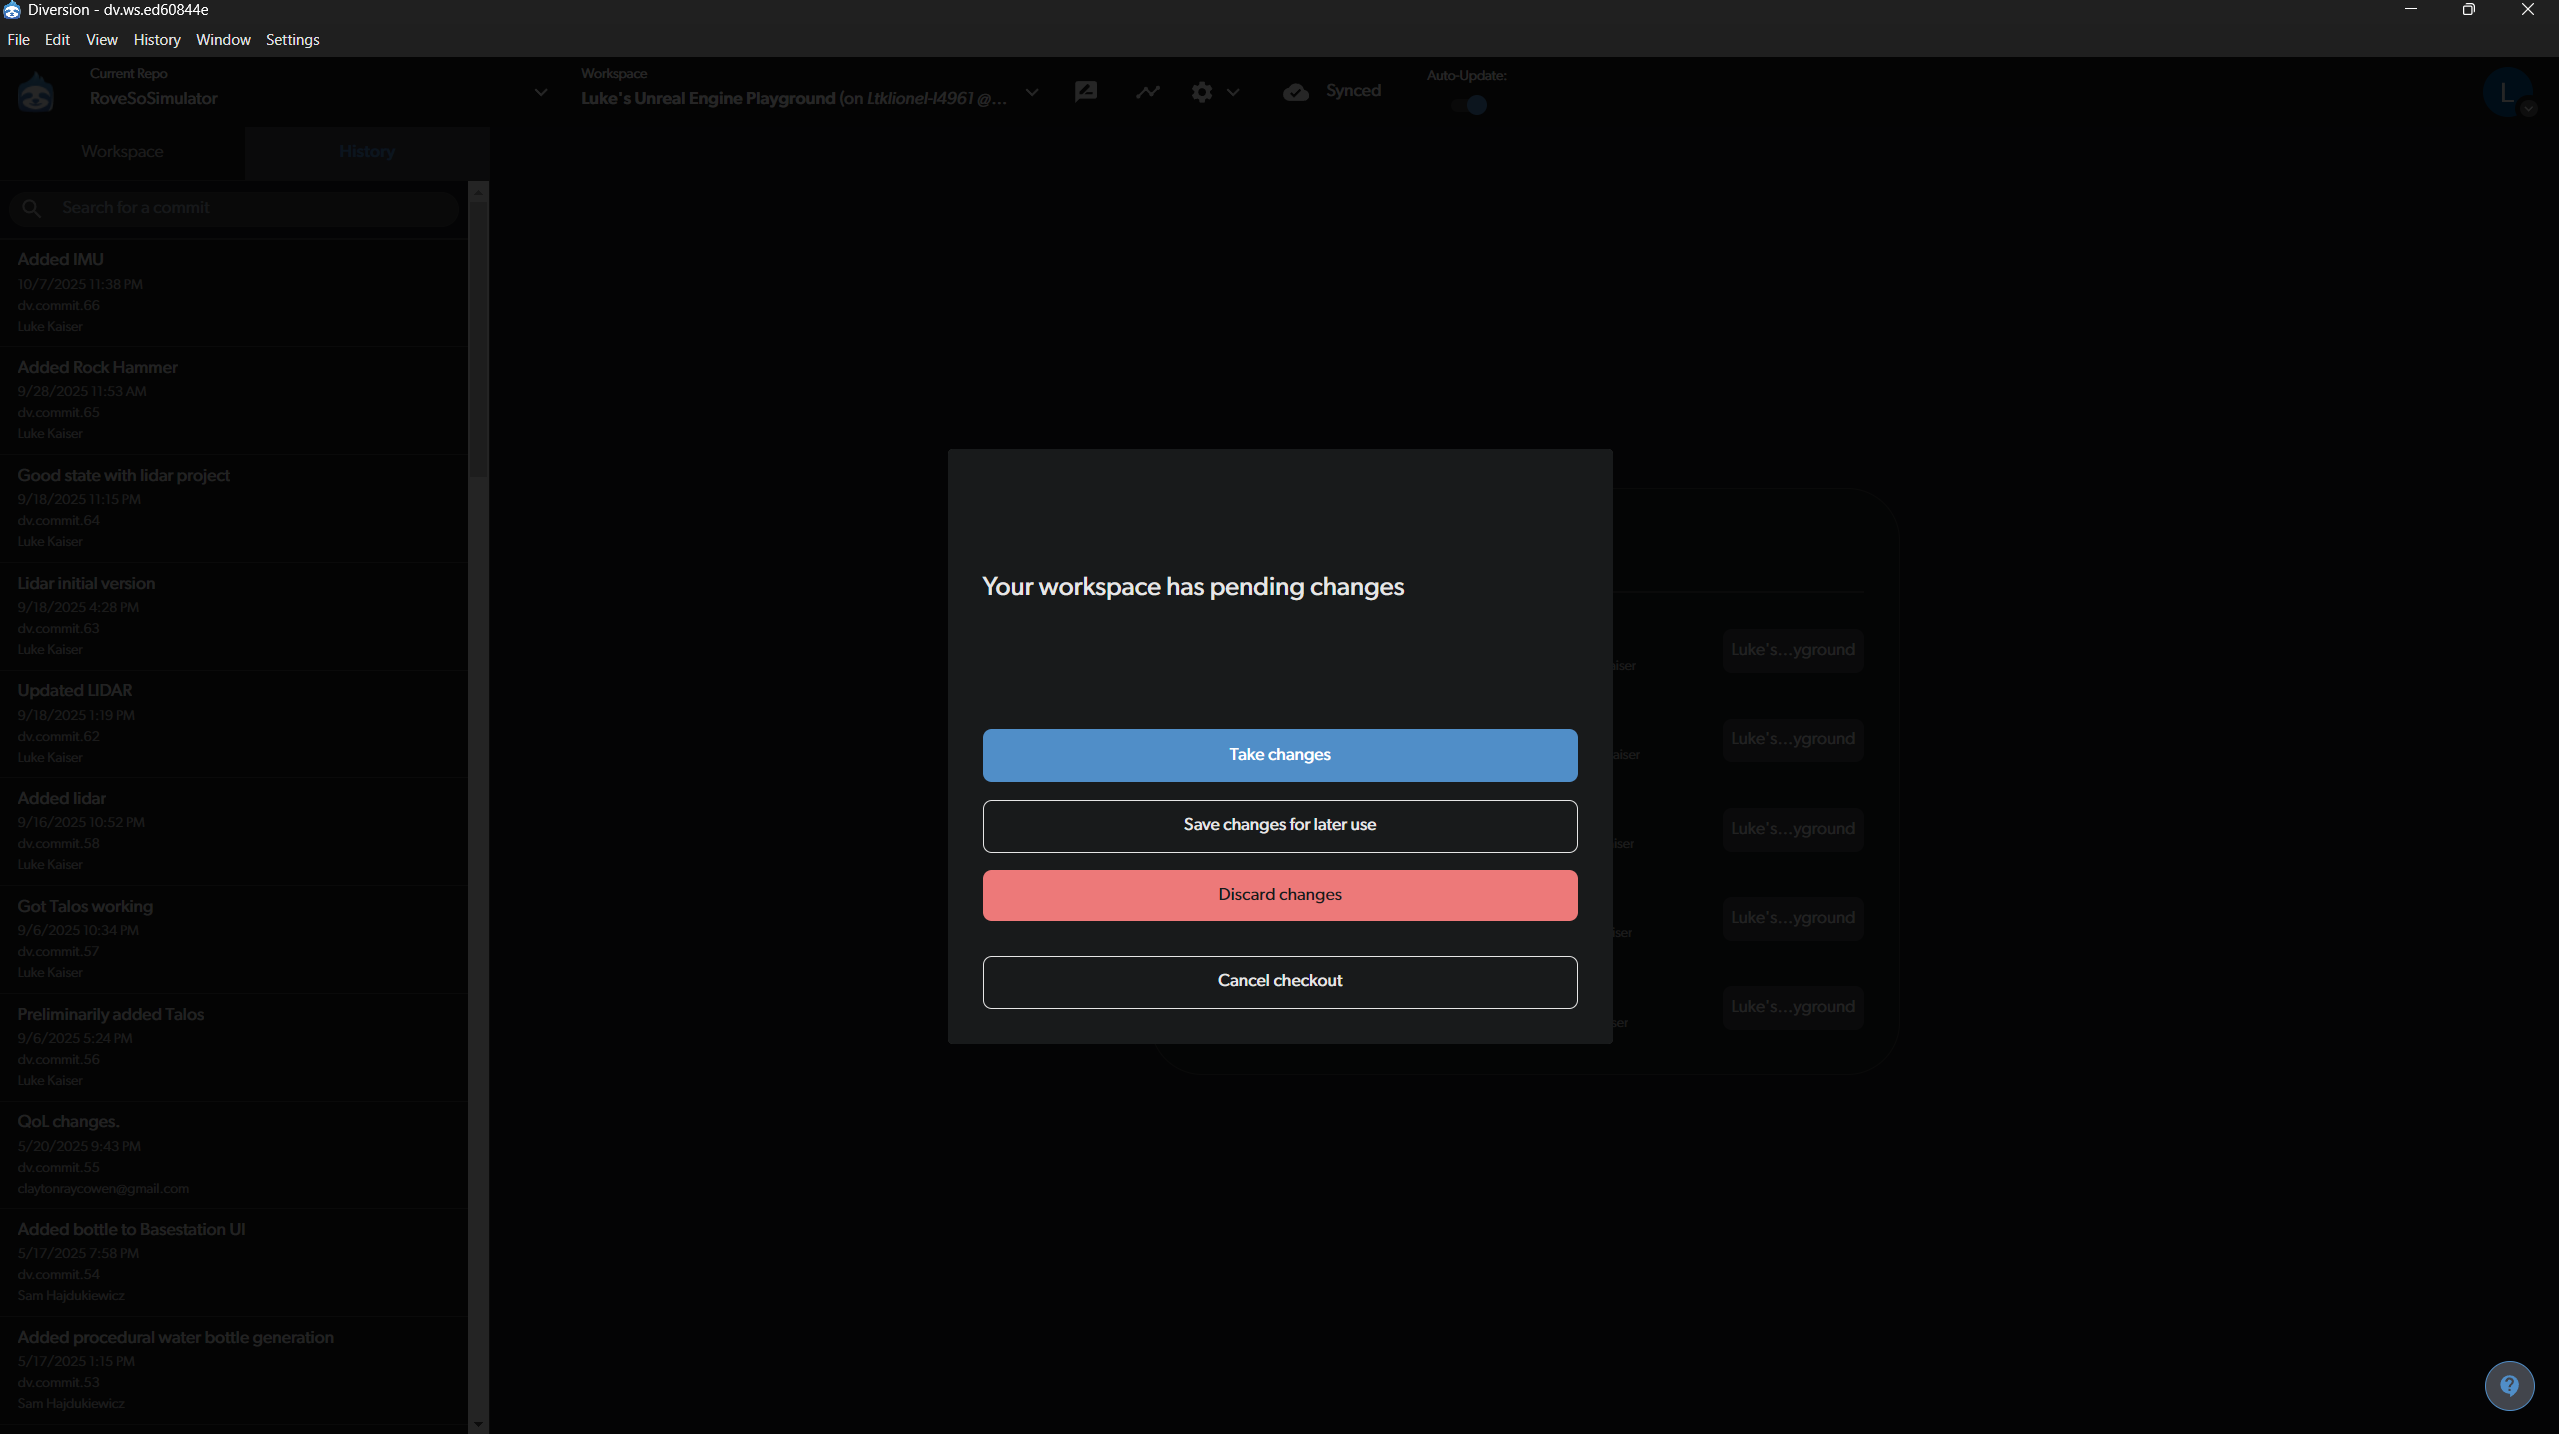
If you have previously “shelved” changes on the branch you are switching to, Diversion will ask if you want to restore them. You can either restore them automatically or skip for now.

Syncing and Viewing History
Your local commits are not sent to the shared repository until you sync.
- Sync Status: The top right of the workspace shows the sync status. “All changes synced” means your local version is up-to-date with the remote server. If you have committed changes locally, it will prompt you to sync them. The image below shows the workspace is fully synced after switching to the
mainbranch.
- Syncing in Progress: When downloading or uploading changes, the status bar will show you the progress.
Visualizing the Commit Tree
For a more advanced view, you can see the commit history as a branching graph. This is useful for understanding how different lines of development diverge and merge.
- Accessing the Tree: This view can typically be accessed from the “History” tab or a dedicated graph button.
- Understanding the View: The image shows the
mainbranch and a separate feature branch (“Luke’s Unreal Engine Playground”). Each circle represents a commit. This visual makes it easy to see the relationship between different branches. - Repo Options: From this view, you can also access repository options like inviting collaborators or managing sync settings.

Diversion Best Practices
- Commit Often: Make small, frequent commits. This makes it easier to track changes and revert them if something goes wrong.
- Write Good Commit Messages: Your message should briefly summarize what you changed and why. This helps everyone understand the project’s history.
- Sync Regularly: Sync at the start and end of your work session to ensure you have the latest changes from others and that your work is backed up to the server.
- Communicate: Before starting a major new feature, talk with the team and create a new branch for your work.
Diversion Troubleshooting
Diversion Sync Issues
Sometimes, when cloning the simulator, switching branches, or syncing, Diversion can get “stuck” and will not finish the process. You can verify this by opening Task Manager and checking network performance. If Diversion reports that it’s syncing but there is little to no network traffic, it is likely stuck.
To fix this:
- Fully Exit Diversion: Close the main window. Then, go to your system tray (the icons by the clock in the taskbar), right-click the Diversion icon, and select Exit. If it’s unresponsive, you may need to end the process in Task Manager.
- Open a Terminal: Navigate to the root directory where you cloned the simulator (e.g.,
C:\Users\<USERNAME>\Documents\GitHub\RoveSoSimulator). - Restart Diversion: Open the Diversion desktop application again.
- Force a Status Check: In your open terminal, type the command
dv statusand press Enter. This command often “wakes up” the sync process. You should see terminal output as Diversion begins syncing correctly. Leave the terminal open until the process is complete.