🛠️ Installing Autonomy Software
Welcome aboard, developer! Ready to get your Autonomy Software environment set up? Follow along, and we’ll get everything installed in no time! Let’s jump in. 🚀
1. 📥 Download and Install the Essentials
Before we start coding, let’s grab some tools to set up our environment. You’ll need:
- 🖥️ Visual Studio Code – Download it here.
- 🧰 Git SCM – Download it here.
- 🐋 Docker – Download it here.
Important: If you're on Windows, install Docker Desktop. For other OSs, go with Docker Engine.
Optional but highly recommended for those with NVIDIA GPUs:
- 🖼️ NVIDIA Container Toolkit – Download it here.
Windows users, you’ll want to integrate WSL (Windows Subsystem for Linux) into your Docker install. Check this guide for some tips.
🎯 Pro Tip: For all installs, select the Add to PATH options whenever available. It’ll save you headaches later!
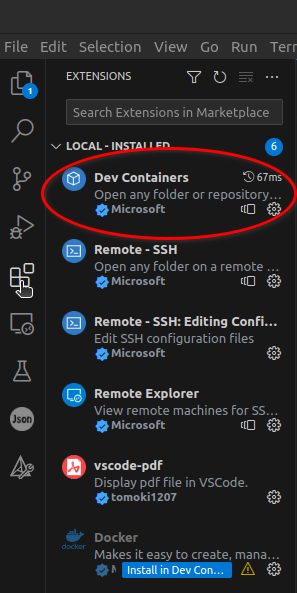
2. 🧩 Open VSCode and Install Extensions
Now that VSCode is installed, let’s power it up with some extensions!
- Go to the extensions tab (the little square icon on the left toolbar) and search for
Dev Containers.
- Click the install button to add it to your toolkit.
Note: Once we’re in the devcontainer, the extensions you install locally will be separate from the ones inside the container. Want a particular extension to be included by default? Hit up one of our software leads.
3. 🧑💻 Clone the Autonomy_Software Repo
Let’s grab the code!
- Hit
CTRL + SHIFT + P to open the command palette.
- Start typing
git clone, then select Git: Clone (Recursive) from the list.
- Paste in this URL:
://github.com/MissouriMRDT/Autonomy_Software.git
- Choose where to save the repo on your local machine—organize it so it’s easy to find later!
- Once the cloning is done, VSCode will ask if you want to open the new workspace. Click Open.
4. 🐳 Open the Repo Inside the Devcontainer
Now comes the fun part: working inside our devcontainer, which is basically a fully-loaded environment ready to go. All the packages, libraries, and tools you need are baked right into the image!
- When you first open the repo, VSCode should prompt you to open it in a devcontainer. Go ahead and click Open.
- If that prompt doesn’t appear, no worries! Hit
CTRL + SHIFT + P again, type Dev Containers: Rebuild Container, and select that option.
Now give it some time to spin up the container—when the logs in the OUTPUT window stop printing, you’re good to go!
5. 🚦 First Build and Run
You’re so close now! Let’s get your first build running:
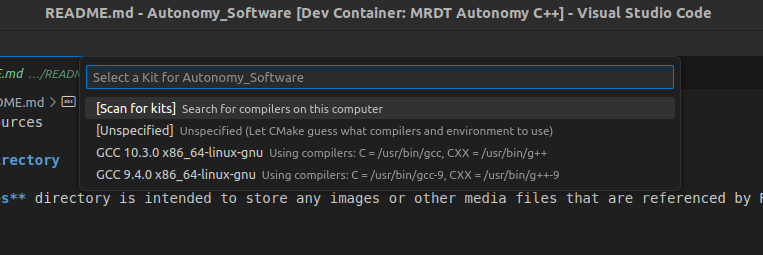
- Once the devcontainer is up, a box will pop up asking which CMake Kit you want to use. Choose the one pointing to
/usr/bin/g++ and /usr/bin/gcc.
- CMake will auto-configure the project if needed. This might take a few seconds depending on your machine. When it’s ready, use the toolbar buttons to build, run, or debug your code with ease!
- You can also perform standard
make commands by navigating to the build/ directory with cd build/, and running your desired commands.
6. 🔍 Explore the Codebase
Now that everything’s set up, feel free to roam around the directories. Get a feel for the structure and what’s inside each folder.
7. 📖 Check the README Files
Inside each directory, you’ll find README files with detailed guidelines. These are your go-to docs for understanding how to organize files and use the functionalities.
8. 🛠️ Start Developing!
That’s it! You’re ready to start coding, debugging, and making the Autonomy Software even better. Happy coding! 🎉